The glass-wool rolls are there, cheap and jaunty in their plastic sleeves, yet the air up here still nips at my knuckles and whispers through the eaves. Down below, the radiators tick and the smart meter nags, while the hatch leaks a thin, expensive draught that you can feel like a sigh. We’ve all had that moment where you wonder if the “bargain” insulation is secretly laughing at you. Then a neighbour mentions a five-minute tweak, and the whole story changes. The trick is simple.
Why ‘cheap’ loft insulation underperforms
Mineral wool on a budget can be brilliant at slowing heat, but only when the air around it behaves. The reality in British lofts is messy: wind washing at the eaves, gaps around cables, and a hatch that fits like a loose tooth. Heat doesn’t just trickle through; it bypasses the blanket at speed, racing through cracks and edges where the roll never quite met the joists.
In one semi I visited, the owners had added two layers of low-cost roll and still lived with a January chill. The fix wasn’t “more fluff”; it was stopping the breeze at the edges and keeping the fibres lofty. A tight hatch seal, simple wind baffles by the soffits, and a raised walkway so the insulation wasn’t squashed. The house didn’t suddenly feel tropical, but the living room kept its heat after 9pm. That’s the win you notice.
Insulation resists conduction; air tightness fights convection. When you mix the two, even thrifty loft roll punches above its weight. Think of the roof as a lung: it needs to breathe at the eaves to stay dry, but it shouldn’t exhale warm air into the sky through every little gap. **Seal first, then insulate**. Keep the fibres fluffy, the edges disciplined, and the moisture on the warm side of the ceiling where it belongs.
Simple add-ons that upgrade a budget loft
Start with the hatch. Stick compressible EPDM or foam draught strip around the lip, then glue a 25–50 mm PIR board to the back of the lid for a neat thermal plug. Add two small toggle latches so the seal compresses evenly. Next, wrap the cold-water tank with a proper jacket and lag every metre of exposed pipework. That quick bundle turns cheap loft roll into a warmer, calmer system straight away.
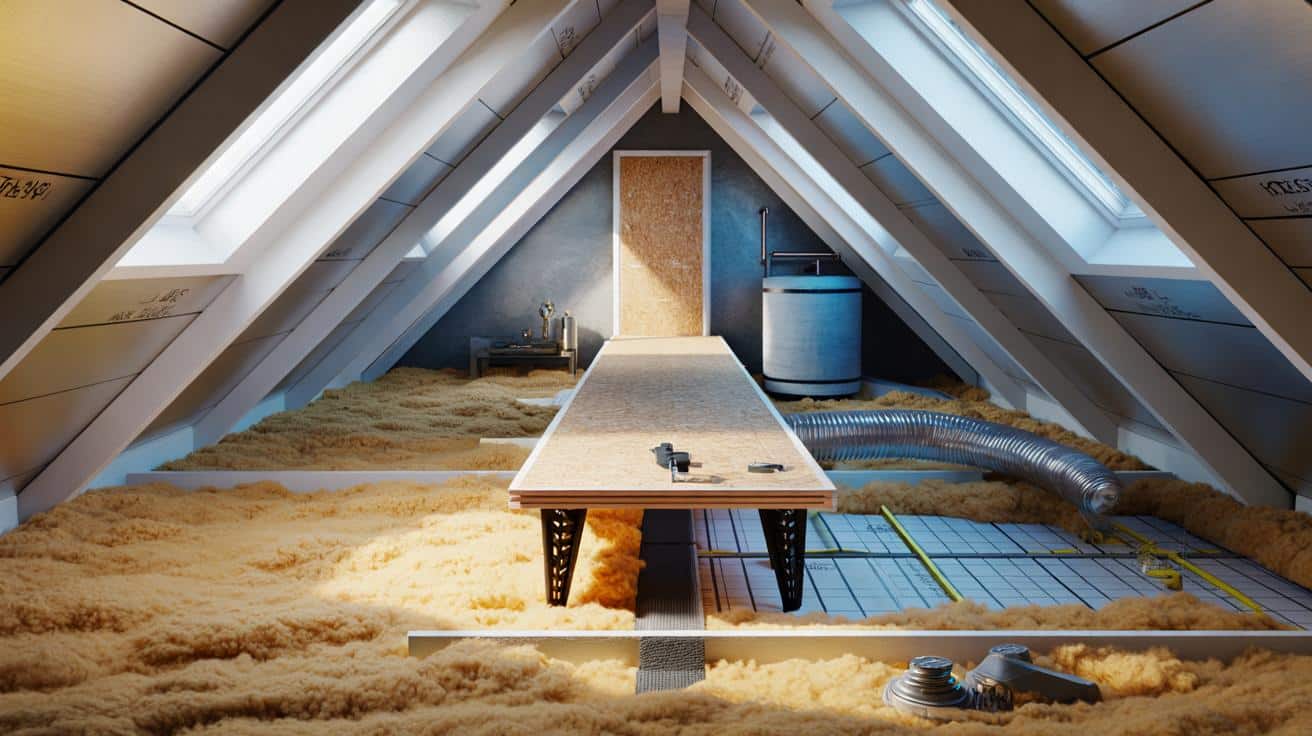
Now protect the insulation from your footsteps. **Raise the floor, don’t squash the wool**. Use plastic loft legs or timber bearers to lift a simple OSB walkway above 270–300 mm of roll. Keep a clear 50 mm air path at the eaves and fit homemade wind baffles from rigid card, Correx, or thin ply to stop cold gusts combing through the fibres. If you’ve got downlights below, cap them with fire-rated covers before you add any vapour-retarding layer or extra insulation. Let’s be honest: nobody actually does that every day.
Small leaks undo big blankets. Prioritise air-sealing around cables, the loft light, and the bathroom extractor with flexible mastic and tape made for vapour control. **Draught-proof the hatch** again if needed; it’s the front door of your heat.
“I earn more warmth by blocking a 5 mm gap than by adding another roll,” a loft installer told me, half-joking and absolutely right.
- Self-adhesive hatch seals and two toggles
- Wind baffles at eaves to stop “wind washing”
- Pipe lagging and a proper tank jacket
- Raised boards on loft legs to protect 300 mm of wool
- Fire-rated downlight covers and a taped vapour layer over joists
What changes the feel of the house
There’s a moment, a week after the tweaks, when the hallway feels less like a corridor to the outside. The thermostat clicks off and the warmth hangs in the air instead of fleeing up the loft ladder. You spend the same evening at home, but the rooms behave differently. *Heat stops being a race and becomes a conversation.*
| Key points | Detail | Reader Interest |
|---|---|---|
| Seal leaks first | Draught-strip the hatch, mastic around penetrations, tape a vapour layer | Immediate comfort boost without buying more rolls |
| Protect loft roll | Wind baffles at eaves, raised boards so fibres stay lofty | Cheap insulation performs like a pricier spec |
| Target cold spots | Insulate tank and pipes, cap downlights, keep eaves ventilation clear | Quick wins you can do in an afternoon |
FAQ :
- How thick should loft insulation be in the UK?For a typical cold roof with mineral wool, aim for around 270–300 mm to hit modern performance levels. Two or even three layers crossed at right angles work well.
- Can I board over insulation without compressing it?Yes. Use loft legs or timber risers to lift boards above the full depth of the wool. Compression reduces thermal performance far more than people think.
- Do I need a vapour barrier?A taped vapour control layer above the ceiling helps keep moist indoor air out of the loft. It reduces condensation risk and makes the insulation behave consistently.
- Is foil bubble wrap worth it?As a radiant layer under rafters in a ventilated loft, it can cut summer glare and drafts, but it won’t replace thick mineral wool on the floor. Think “add-on”, not “instead of”.
- What about ventilation and mould?Keep a clear air path at the eaves and don’t block soffit vents with insulation. If the loft looks damp, solve bathroom extract and air leakage first, then add insulation.