Britain’s open‑plan homes amplify appliance noise, yet you can tame the racket and curb electricity use with quick, safe steps. This guide shows what to check, what to adjust in minutes, and when to ring a professional.
Common causes and quick checks
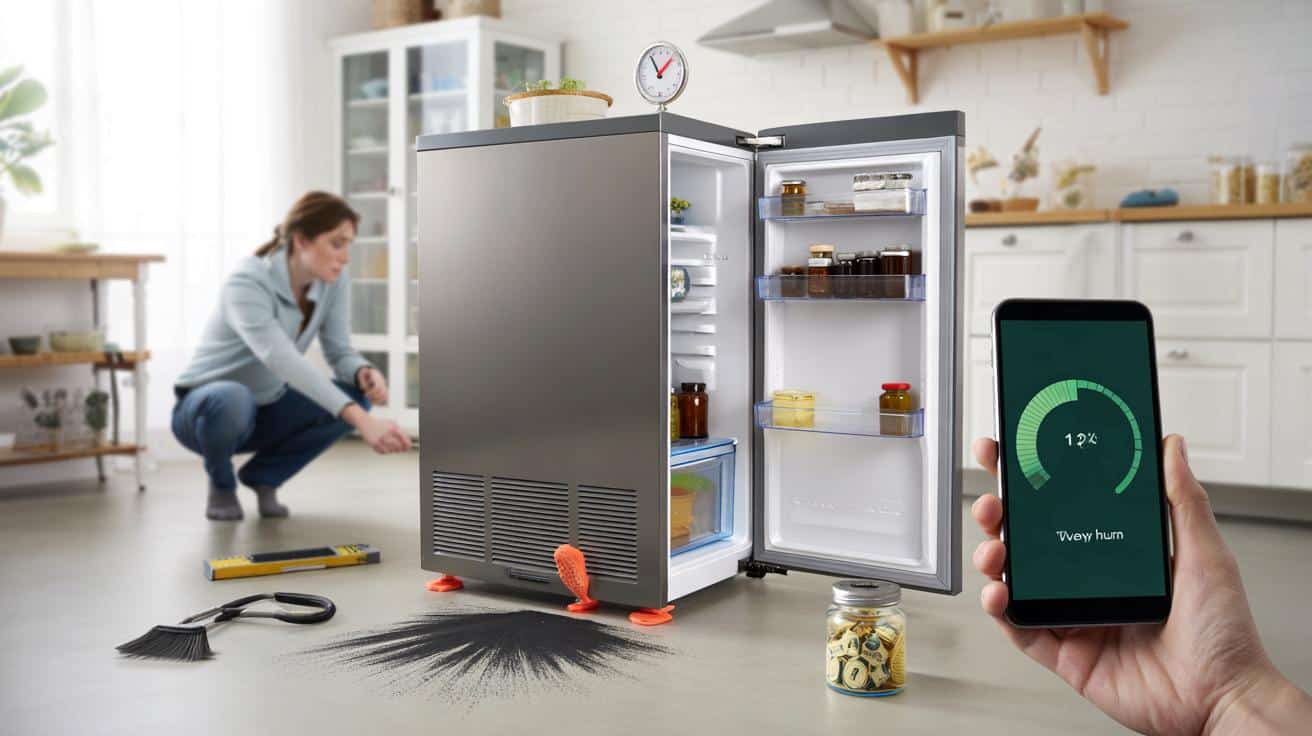
Most noisy fridges aren’t broken. They sit out of level, vibrate against cabinets, or run hot because dust throttles airflow. Simple corrections cut noise and lower running costs at the same time.
Level and location
Place a spirit level on top. If the bubble drifts, twist the front feet until the cabinet sits flat and stable. Rocking frames turn every motor pulse into a rattle. Pull the unit forward and give it breathing room.
Keep at least 5 cm clear on each side and at the rear so heat escapes and vibrations don’t echo off the wall.
Open the door and scan the shelves. Bottles touching, loose trays, and tins pressed against the back panel can buzz like a tuning fork. Space items so they don’t touch each other or the liner.
Airflow and dust
Heat must leave through the rear grille and any internal fan. Dust blankets these parts and makes the compressor work harder and longer. Unplug the appliance. Brush the grille, then vacuum gently. Use a soft paintbrush to lift lint from the fan guard without bending it.
Ten minutes with a brush twice a year can trim energy use by 5–15% and soften the noise profile noticeably.
Noise ratings help set expectations. Many “quiet” fridges sit around 35 dB in lab tests. Your kitchen will differ, yet the goal at home is the same: a clear drop after your checks.
Immediate fixes that lower noise and bills
Target the parts that extend motor run‑time or transfer vibration into your floor and units. These tweaks deliver quick wins.
Defrost, set temperatures, and organise
- Defrost the freezer fully if ice exceeds 5 mm. Heavy frost cracks, traps fans, and wastes power.
- Set the fridge to about 4 °C and the freezer to −18 °C. Colder settings keep the compressor running longer.
- Avoid overfilling. Leave gaps so air circulates freely and the motor cycles off sooner.
- Keep jars and bottles slightly apart. Add a silicone mat under loose trays to stop chatter.
Thick ice and blocked airflow both raise noise because the compressor fights to hit temperature. Clearing those obstacles shortens cycles and softens the hum.
Seals, mounts, and anti‑vibration pads
Run a bank card around the door seals. If the card slides out easily or you see cracks, the gasket leaks. Warm air slips in, the compressor labours, and the buzz swells. Replace seals that no longer grip.
Look behind the fridge with the power off. Check brackets around the compressor and any loose panels or pipes. Snug them up gently. Do not overtighten, and never pinch a copper line.
If your floor is timber or tiles over joists, vibrations travel. Fit rubber anti‑vibration pads under each foot. They cost a few pounds and act like earplugs for your floor.
Small outlay, big comfort: pads and a seal refresh often shave several decibels and shorten run‑time in the evening.
What those sounds really mean
| Sound | Likely cause | What to do now | Time/cost |
|---|---|---|---|
| Soft gurgle or hiss | Refrigerant flow | Normal if brief | 0 min / £0 |
| Short creaks or pops | Plastic/metal expanding | Normal after defrost or door openings | 0 min / £0 |
| Constant rattle | Cabinet out of level, items touching, loose panel | Level feet, space items, tighten screws | 15 min / £0 |
| Loud fan scrape | Ice build‑up or debris at fan | Defrost fully, clean guard, remove lint | 45–90 min / £0–£5 |
| Rapid clicking, won’t cool | Compressor start issue | Unplug, call a qualified engineer | — / service call |
When to worry and who to call
Brief gurgles and gentle fan noise come and go. Investigate if noise persists after levelling, cleaning, and defrosting. Watch for a rising volume trend over days, or a steady scrape from the fan area. Feel the sides. Excess heat and a hot, sharp odour point to strain.
Other red flags include rapid compressor clicking, a door that won’t seal even with new gaskets, or visible sparks. Switch off at the wall and wait. Contact the manufacturer’s service line or a refrigeration engineer and report the symptoms you observed.
The money angle: small tweaks, real savings
Let’s put numbers on it. A typical fridge‑freezer might use 250–320 kWh a year. Dusty coils and heavy frost can add 10–30% in tough cases. Clear the grime and ice, and you could avoid 25–80 kWh annually. At 28p per kWh, that’s roughly £7–£22 back. If your unit runs hotter or older, savings climb, and the kitchen sounds calmer.
Measure the before and after with a phone sound‑meter app. These apps aren’t lab‑grade, yet they show trends. Aim to move from, say, 45 dB next to the fridge down towards the mid‑30s. A 10 dB drop feels roughly half as loud to most ears.
Practical routine that keeps the peace
Every week
- Space jars and bottles, and check nothing touches the back wall.
- Wipe the door seals and remove crumbs that break the seal.
Every six months
- Unplug, brush the rear grille, and vacuum the floor dust bunnies.
- Defrost the freezer if ice grows thicker than a 5p coin.
- Verify the feet are still level after floor shifts or cleaning.
Routine beats replacement: a clean, well‑spaced fridge runs quieter, cools faster, and lasts longer.
Extra pointers for modern homes
Open‑plan rooms amplify hum. Park the fridge on a solid surface, not a floating laminate threshold. If you fit it into a snug alcove, add ventilation gaps top and rear or noise will rise as heat builds. In a studio flat, consider models with a night mode and a rating of about 35 dB or lower on the label.
Buying soon? Compare noise and energy labels side by side. A unit that uses 60 kWh less per year saves about £17 at 28p/kWh and usually whispers more softly. Ask about the compressor type. Inverter models vary speed, which smooths the tone compared with on/off motors.
A final set of helpful nudges
Test seal grip with the paper test: shut a sheet in the door and tug. Strong resistance signals a good seal. Easy slip means a leak. Replace gaskets by model number and warm them with a hair dryer to seat them neatly. Fit anti‑vibration pads (£8–£15) and a thin rubber mat on a noisy shelf for bottle chatter.
If you rent, keep notes. Record noise levels before and after cleaning and levelling, and share them with your landlord if issues persist. Clear evidence speeds approval for a repair visit. Keep the manual’s temperature advice handy, and label your next calendar reminder for a pre‑winter clean. Your ears, food, and bill will thank you.