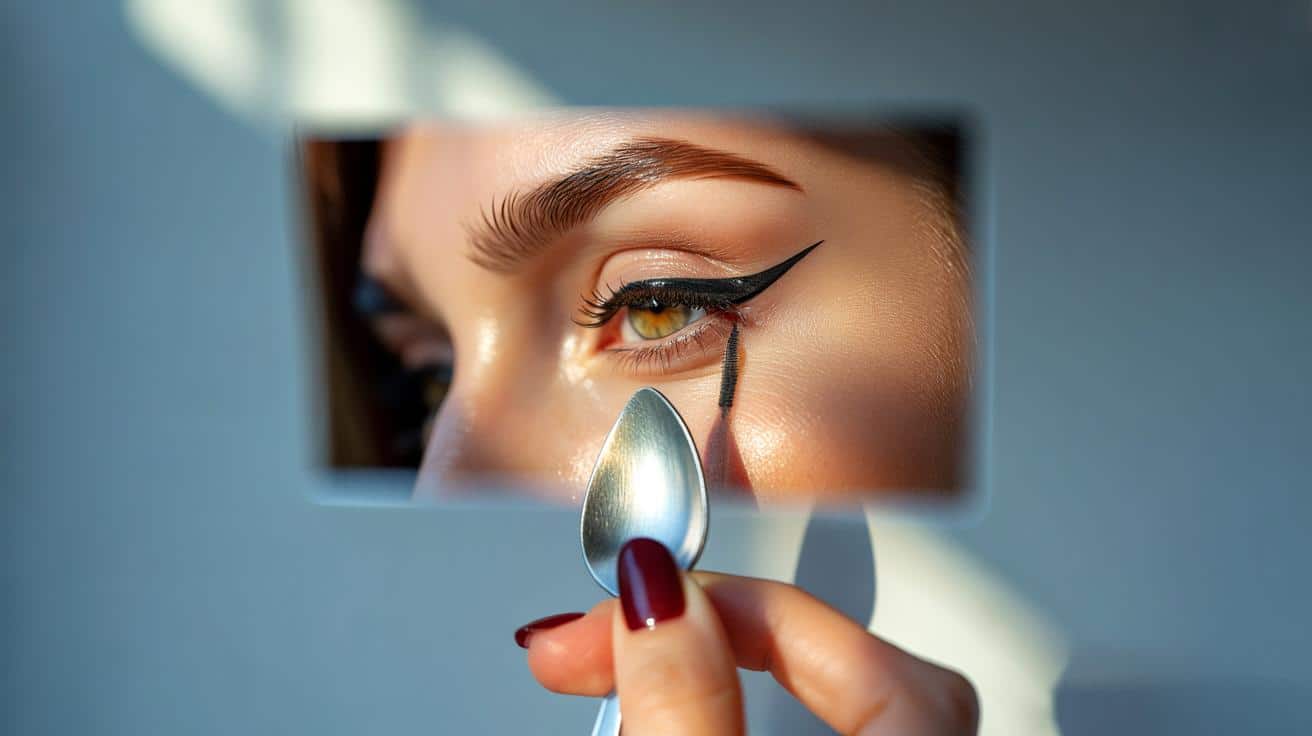
One eye comes out like a Vogue cover, the other like a short story about chaos. You tilt your chin, blink twice, try the stretch-and-draw trick you saw on TikTok, and still end up dabbing micellar water onto a cotton bud with the resignation of a detective cleaning up a crime scene. Somewhere in the drawer, beneath rubber bands and takeaway soy sauce packets, there’s a teaspoon. Cold, ordinary, a bit scratched from life. You hold it to your cheek just to see. The angle suddenly makes sense. The hand steadies. The wing appears like it knew the route all along. You breathe. The spoon changes everything.
Why a humble spoon fixes the flick
Winged eyeliner fails in the space between a good idea and a shaky hand. A spoon reduces that space. The handle gives you a crisp angle; the bowl mirrors the natural curve of your lash line. Less guesswork, more guide.
Think of it as training wheels for your flick. You’re no less skilled for using them. You’re simply giving your muscle memory a map it can follow at 7:32 a.m., when the bus won’t wait and your eyelids feel rebellious.
On mornings when your coffee trembles, the spoon becomes a stabiliser. You can lock the handle along the lower lash line and tilt toward the brow tail for lift. That single move decides whether your wing slants up, stays straight, or droops. The bowl then rounds the top edge into something soft and intentional. Geometry meets face. Quick maths, pretty result.
The story behind the trick
This shortcut didn’t start with influencers. Long before reels and ring lights, assistants on shows and shoots grabbed whatever was clean and curved. A spoon wins because it’s present, wipeable, and consistent. It repeats the same angle on Tuesday that it gave you on Saturday night.
I watched a hairstylist in Soho swipe a teaspoon from the coffee station and hand it to a model with teary eyes. The handle lined her outer corner; the bowl hugged the lid where it creases. Two tiny strokes later, symmetry. The room exhaled. No product switches. No panic.
Psychologically, it helps too. Your brain stops wrestling with infinite choices. A spoon introduces a boundary, and boundaries reduce error. It lets you focus on pressure, pigment, and pace, not on reinventing the angle every time. You move from improvisation to a repeatable ritual. That’s how rituals become skills.
The spoon technique, step by step
Start with a clean, dry teaspoon. Prime the lids so the liner grips. Choose your weapon: a felt-tip for speed, a gel with a firm brush for precision, or a soft pencil smudged then set with shadow.
Hold the spoon handle so it lines up with your lower lash line and points towards your brow tail. That’s your runway. Place the edge against the outer corner and draw a short line along it, no longer than the width of your nail bed. Rotate the spoon so the bowl curves over your lid; use its rim to outline the top of the wing and connect to the lash line. Fill the tiny triangle. Clean the underside with a pointed cotton bud dipped in micellar water, then press a touch of matte shadow to lock it in. Anchor your elbow on the table to stabilise the line.
Press, don’t drag. If your eye waters, pause and look down until it settles. Go for two thin coats over one anxious swipe. We’ve all had that moment when the left wing looks smug and the right looks tired. Do a dry run with the spoon before you add product. Let’s be honest: nobody does this every day.
Common pitfalls? Pressing too hard leaves an imprint instead of a guide. Aiming the handle directly at the end of your brow can pull the wing too high for round eyes. Wipe the spoon between eyes. Keep your gaze neutral, not raised, while mapping the shape. You’re not performing surgery. You’re sketching.
For hooded lids, shift the handle a touch flatter so the wing reads when your eye is open. For almond eyes, a slight lift keeps the shape elegant. For downturned corners, an extra millimetre of upward tilt brings the energy back. Precision is personal. Tiny changes in angle change the whole mood of your face.
“A spoon is the fastest way to copy-and-paste a wing from one eye to the other,” says a London backstage artist. “It’s not cheating. It’s engineering.”
- Match spoon size to eye size: teaspoon for most, baby spoon for petite lids, dessert spoon for bold drama.
- Warm the spoon in your palm for ten seconds so gel glides and doesn’t skip.
- Map with a brown pencil first if black feels high-stakes, then trace over.
- Keep cotton buds and a flick of concealer handy as your safety net.
Make it yours and make it fun
Once the muscle memory lands, the spoon is less a crutch, more a compass. You’ll know instinctively when to tip up for a Sixties cat eye or hold flatter for something modern and tight to the lashes. Play on a Sunday with no stakes and a playlist you love.
You can also bend the rules. Swap black for mocha on fair days. Add a whisper of shimmer along the top edge for evening. Trace the wing first, mascara second, or flip it if your lashes are long and ticklish. The order can flex with your mood.
*This is makeup, not homework.* Try a micro-wing that lifts without shouting on office days, and a lifted, elongated flick for date nights. Share your angle in the bathroom light, then step outside and see it in daylight. Your future self will thank you when the photos age well.
| Point clé | Détail | Intérêt pour le lecteur |
|---|---|---|
| Choosing the right spoon | Teaspoon for standard lids, baby spoon for small eyes, dessert spoon for dramatic curves | Faster mapping, fewer mistakes |
| Locking the angle | Align the handle with the lower lash line towards the brow tail | Instant lift and symmetry |
| Finishing moves | Clean with micellar, set with shadow, soften with a tiny smudge if needed | Longer wear, softer edges when you want them |
FAQ :
- What liner formula works best with the spoon technique?Felt-tip pens glide cleanly along the spoon edge, while gel gives the most control if you’re slower. Pencil is great for mapping, then layer liquid on top.
- How do I adjust for hooded or deep-set eyes?Place the handle slightly flatter and draw the wing while looking straight ahead into a mirror. Keep the wing thin at the outer third so it reads when your eye is open.
- My wings never match. Any quick fix?Map both outer lines first using the handle. Step back, squint, adjust, then commit to filling in. Symmetry lives in the planning, not the clean-up.
- Can beginners try this with brown instead of black?Yes. Brown softens the learning curve and forgives tiny wobbles. Once the motion feels natural, switch to black for punch.
- What if I overdo the thickness?Thin the top edge with a pointed cotton bud and micellar water, then pat on concealer. A dusting of skin-toned powder resets the canvas without starting over.